Friday 13 October 2017

MongoDB Instance in Authentication Mode

I am writing this blog in continuation of my previous blog about how to run Mongo Server as service in windows, to know more please read my prev blog. In this blog, I am going to explain about how to run a server in authentication mode. I will try to keep it in my simpler word.

I assume that you have created the service which runs the mongo server in No Authentication Mode. Or you are able to connect to the server. Let’s begin with this assumption step by step.

Step 1: Connect to the server in No Authentication Mode, Please go through this blog post.

Step 2: Use Admin database by using command “use admin”.


Step 3: Create a user with “userAdminAnyDatabase” in role.
           db.createUser(
           {
             user: "sa",
             pwd: "password",
             roles: [ { role: "userAdminAnyDatabase", db: "admin" } ]
           })


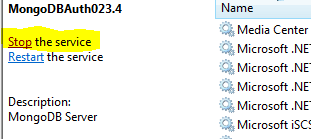
Step 4: Disconnect the Mongo Db (Exit if you are using cmd prompt). In case you are using service then please stop that by clicking on stop.


Step 5: Now you can connect to Mongo DB in auth mode from my prev blog. Or create a service in authentication mode by following my previous blog.

References:

Thursday 11 May 2017

Mongo DB Atlas


Mongo DB recently announced DBAAS (Database as a Service) called Mongo DB Atlas. I was looking for something similar for my project on Azure platform. Unfortunately, that's not available as of now. But they promise that will be available soon. There are many DBAAS available in market like few mentioned below
1.       MongoLabs(mLabs)
2.       MongoHQ(Compose)
3.       ObjectRocket
Let's start with Atlas today, maybe I will cover other services in upcoming blogs. Let’s cover step by step.

Step1: Register yourself if you are first time user. Please follow their steps mentioned on Link

Step2: Once you are registered there, you can create a cluster which is you mongo DB Server. You can configure it as well. As you can see, give a good name to your cluster so that you can identify in future. Next, you must choose the location where this server will reside. You can see an overview of the cluster on the right side with details of RAM size and disk storage available.  The price will vary based on your instance size selection. Generally, M0 comes free of Cost, you can cheese based on your requirement.


Step3: Choose the number of shards and replication factor. It’s not available for free tier except choosing replication factor. The replication factor is nodes where it will maintain a copy of data so that in a case of failover it can take from the redundant node. Sharding is the process of storing data records across multiple machines.


Step4: You are ready with cluster now, you will be able to see detail like below.


Step5: You can download Mongo DB compass from their site. Here is the link.
Step6: You can copy the connection string from the site, I have marked in the image above. And Mongo compass automatically detects the clipboard and prompt you to paste.
Step7: Add the IP Address you are trying to connect from. You get the screen when you click on connect.

You are ready to connect to your Mongo DB server.


Wednesday 15 July 2015

Connect To Mongo DB Instance


In my previous blog I have created the instance. If you are not having any instance running then please create one. You can follow my previous blogs for that.

Assuming, you have a server running without authentication mode. So in that case it becomes very easy, we don’t need any password or any user name. There are many ways we can connect to the server.
  •     Using cmd prompt
  •     Using mongo.exe, which is client tool for mongo DB.
  •     Using third party tool like mongochef, Robomongo

Using cmd prompt:
You open cmd prompt and change the directory to bin folder of mongo DB and then type below commands.

Default connection and without authentication:
{mongo} --> Then press enter.


But if you are connecting to a secure server then you should use below command:
{mongo localhost:27017/admin –u sa –p }, Then press enter.
  • –u sa –p are required only when you are connecting server instance in authenticated mode.
  • localhost:27017/admin --> This is the location and port where server is hosted.

Using mongo.exe:
Just double click on this executable to open in default mode.

But if you are connecting a particular server, then use command
{db=connect(“localhost:27017/admin”);}

This will connect to the database and if there is authentication in the server then you should use authentication command   soon after the connections are established as below
{db=connect(“localhost:27017/admin”);}
{db.auth (“user”, “Password”);}


References:

MongoDB Server Instance As Service


From my last blog as i discussed about how can we run an Instance using cmd. As you might have noticed the instance have started but a command prompt get engaged with this and a window remains open always which looks little odd. It’s not good practice to run your server like this because any one  can close server may be by mistake and restarting will have to go through all pain using cmd.


So we can run the instance as windows service, which become easy to manage. You can start, stop and restart easily. Otherwise you have to follow steps and type all info again if you are restarting. Here is the screenshot of service I have created.


Now unlike any other service you can start, stop or restart.


In order to do so, we have to open command prompt again and change the directory to bin folder follow step 2 as mentioned in my previous blog. Now type command mentioned below.


Make sure you have created a directory and log file: C:\data\log\MongoDB.log. You can create according to your choice, I have chosen C:\data\log\MongoDB.log.


{mongod --auth --bind_ip  localhost --logpath  "C:\data\log\MongoDB.log"  --logappend  --dbpath  "C:\data\db"  --port 27017 --serviceName "MongoDB3.0" --serviceDisplayName "MongoDB3.0" --install}


--auth :if you want to run your server in authentication mode, which at this point not required rest is self-explanatory. So without authentication the command would be


{mongod  --bind_ip  localhost --logpath  "C:\data\log\MongoDB.log"  --logappend  --dbpath  "C:\data\db"  --port 27017 --serviceName "MongoDB3.0" --serviceDisplayName "MongoDB3.0" --install}


 References:

http://docs.mongodb.org/v2.2/reference/mongod/